Most travelers take 47 photos per day on vacation, according to a 2026 survey by Mylio. About 92% of those will never be looked at again after the first week home. That is a lot of wasted memory card space — and a lot of missed opportunities.
This guide covers the specific camera settings, composition rules, and gear choices that separate a forgettable snapshot from an image you would actually print and frame. No vague advice. Just what works.
What Makes a Vacation Photo Look Like a Tourist Shot
The problem is almost never the camera. It is the lack of a deliberate choice about what the photo should communicate.
A tourist shot says: “I was here.” A good travel photo says: “This is what it felt like to be here.”
Three specific mistakes cause the difference.
Mistake 1: Shooting from standing eye level every time
Every single person standing at the Eiffel Tower takes the same photo from the same height. The result is a collection of nearly identical images. Change your physical position. Crouch down. Climb a bench. Hold the camera over your head. A difference of 18 inches in height changes the entire relationship between foreground and background elements.
Mistake 2: Including too much
Wide-angle lenses capture everything. That is exactly why most vacation photos look cluttered. The human eye naturally ignores a trash can, a tour group, or a parked scooter. The camera does not. Zoom in to 50mm equivalent or tighter and remove 70% of the frame. What remains will be the subject.
Mistake 3: Shooting at noon
Direct overhead sunlight creates harsh shadows under eyes and noses. Skin looks blotchy. Colors wash out. The single best change any traveler can make is shooting only during the golden hour — the 60 minutes after sunrise and the 60 minutes before sunset. If you cannot wait, find open shade. A building shadow or a tree canopy gives you soft, even light that flatters everything.
These three fixes cost nothing. They require only awareness and a willingness to look slightly strange while crouching in public.
Camera Settings That Actually Matter for Travel
You do not need to understand the entire exposure triangle. You need to know three settings and when to change them. This applies to every camera — from a Sony A7 IV ($2,498 body only) to an iPhone 16 Pro ($1,199).
| Setting | Daytime (sunny) | Golden hour | Night / indoors |
|---|---|---|---|
| ISO | 100–200 | 200–800 | 1600–6400 |
| Aperture | f/5.6–f/8 | f/2.8–f/4 | f/1.4–f/2.8 |
| Shutter speed | 1/250s or faster | 1/125s | 1/30s or use tripod |
Rule number one: keep your shutter speed at or above 1/125s for handheld shots with a 50mm lens. Slower than that and camera shake will blur your image. If the scene is too dark, raise the ISO before dropping the shutter speed. A grainy photo is better than a blurry one.
Rule number two: use aperture priority mode (A or Av) and let the camera pick the shutter speed. Set your aperture to f/5.6 for landscapes where you want everything sharp. Set it to f/2.8 or wider for portraits where you want the background blurred. That single switch handles 80% of travel scenarios.
Rule number three: turn off auto white balance. Set it to “Daylight” (5200K) for outdoor shots and “Shade” (7000K) when under a tree or building shadow. Auto white balance shifts colors unpredictably between shots, making a series of photos from the same location look mismatched.
Composition Is Not a Mystery — It Is Three Rules
Every famous travel photographer uses the same handful of composition techniques. You do not need to invent anything. You just need to apply them deliberately.
The rule of thirds, applied correctly
Most people know to put the subject off-center. Fewer people know why. The rule of thirds creates tension between the subject and the empty space. A person standing on the left third of the frame looking right creates a natural flow. The viewer’s eye moves from the person to the space they are looking into. That movement is what makes an image feel alive.
Turn on the grid overlay in your camera or phone settings. Place your subject on one of the four intersection points. Then leave the opposite third empty or with a secondary element like a horizon line.
Leading lines force the eye where you want it
A road, a fence, a shoreline, a row of columns — any continuous line that starts at the bottom edge of the frame and points toward your subject. Leading lines are the cheapest trick in photography because they exist everywhere. A cobblestone street in Prague is a leading line. A pier extending into a lake is a leading line. Use them.
Position yourself so the line enters from the bottom left or bottom right corner and points toward the center or the upper third. This gives the image depth and structure instantly.
Negative space is not wasted space
New photographers try to fill every inch of the frame with something interesting. That creates visual noise. Negative space — a blank wall, a clear sky, a flat ocean — gives the subject room to breathe. A single person standing in a vast desert with 80% sky above them is more powerful than the same person surrounded by rocks and bushes.
When you see a cluttered scene, zoom in or move closer until the background simplifies. If you cannot simplify the background, change your angle until the background becomes a single color or texture.
Gear That Makes a Real Difference (and Gear That Does Not)
The travel photography gear market is full of products that solve problems you do not have. Here is what actually matters.
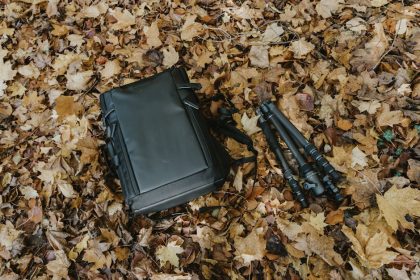
A tripod under 2 pounds
Most travelers leave their tripod at home because the one they own weighs 5 pounds. The Peak Design Travel Tripod ($599.95, carbon fiber version) folds to 15.5 inches and weighs 2.81 pounds. It fits inside a carry-on bag. It allows you to shoot at dawn and dusk — the only times worth shooting — without camera shake. For night cityscapes or long-exposure waterfalls, a tripod is not optional.
If $600 is too much, the Manfrotto Element MII ($199, aluminum version) weighs 2.2 pounds and holds up to 17.6 pounds of gear. It is 16 inches folded. That is the minimum acceptable quality for travel.
Do not buy a $40 tripod from Amazon. The head will sag, the legs will wobble, and you will stop using it after two days.
A polarizing filter, not a UV filter
Camera stores love selling UV filters. They claim it protects the lens. What it really does is add glare and reduce contrast. A circular polarizer (CPL) filter does two things a UV filter cannot: it cuts reflections off water and glass, and it deepens blue skies. A 67mm CPL from B+W or Hoya costs about $80. It screws onto the front of your lens and rotates. You see the effect in real time through the viewfinder.
For beach vacations, lake shots, or any architecture with glass windows, a polarizer is the single best filter investment. Without it, you are capturing glare. With it, you are capturing color.
What you do not need
You do not need a new camera body. The Canon EOS R6 Mark II ($2,499 body only) is excellent, but your current phone or camera from 2026 is capable of 95% of the same results. You do not need a 70-200mm f/2.8 lens. It weighs 3 pounds and costs $2,500. A 24-70mm f/4 or a 24-105mm f/4 covers 90% of travel scenarios in a single lens.
You do not need a drone. The DJI Mini 4 Pro ($1,099) takes beautiful aerial shots, but most destinations restrict drone use. Check local laws before buying. In Italy, France, and Japan, you face fines for flying without permits.
When Your Phone Is the Better Choice
A dedicated camera produces better image quality in controlled conditions. But travel is rarely controlled. Your phone wins in three specific situations.
Situation 1: Quick candids. You see a street musician or a child laughing. By the time you raise a dedicated camera, adjust settings, and focus, the moment is gone. The iPhone 16 Pro or Google Pixel 9 Pro starts shooting in under one second from a locked screen. Speed beats quality for candid moments.
Situation 2: Low-light without a tripod. Night mode on modern phones uses computational photography to stack multiple exposures. A single handheld shot at night from a phone will be sharper than a single handheld shot from a full-frame camera at the same ISO. The phone is doing in software what the camera cannot do in hardware without a tripod.
Situation 3: Places where cameras are banned or unwelcome. Museums, certain temples, and crowded markets often prohibit “professional cameras.” Phones are rarely challenged. If the choice is a phone photo or no photo, take the phone photo.
For everything else — landscapes, portraits, architecture, food — a dedicated camera with a large sensor and a proper lens will produce noticeably better results. The difference is most visible when you print larger than 8×10 inches or crop heavily.
Editing Is Not Cheating — But Most People Edit Wrong
Shooting in JPEG means the camera makes all the editing decisions for you. Shooting in RAW means you make them later. RAW files contain all the data the sensor captured. JPEG files discard about 60% of that data permanently. RAW gives you the ability to fix exposure errors, recover shadows, and adjust white balance without destroying image quality.
Every serious travel photographer shoots RAW. The downside is file size — a single RAW image from a 33-megapixel sensor like the Sony A7 IV is about 50MB. A 128GB memory card holds roughly 2,500 RAW images. That is enough for a two-week trip if you are selective.
Three edits that fix most photos
Open your RAW file in Adobe Lightroom ($9.99/month for Photography Plan) or the free Capture One Express. Do three things and stop.
1. Set the white balance. Use the eyedropper tool on something that should be neutral gray — a white wall, a gray rock, a concrete sidewalk. This removes color casts in under five seconds.
2. Increase contrast by +10 to +20. Most RAW images look flat. A small contrast boost adds snap without looking artificial. Do not touch clarity or texture. Those sliders create halos and unnatural edges.
3. Lift shadows by +15 to +30. This recovers detail in dark areas without blowing out highlights. If the sky is blown out, pull highlights down by -20 to -40. That is it. No saturation slider. No vibrance. No graduated filters. Three adjustments handle 80% of travel photos.
Over-editing is the fastest way to make a photo look amateur. HDR effects, excessive sharpening, and oversaturated colors signal that the photographer did not trust the original scene. Trust the light you shot in. Editing should enhance what is there, not replace it.