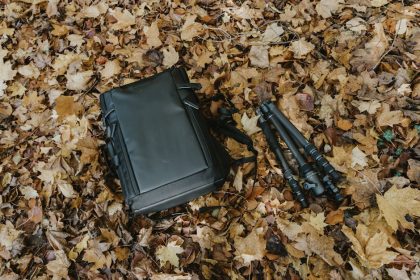

You booked the flight. You bought the backpack. Now you’re staring at a pile of clothes on your bed wondering how to fit three weeks of life into 40 liters. I’ve been there. And I made every mistake you’re about to make.
Here’s the thing nobody says out loud: most first time backpackers pack twice what they need and still miss the things that matter. This article fixes that. No fluff. No affiliate links. Just the real costs, the real mistakes, and a system that works.
Why Your Backpack Is Too Heavy (And How to Fix It Before You Leave)
The number one complaint from new backpackers? “My back hurts.” The cause is almost always the same: a pack that weighs more than 10 kilograms. And the culprit isn’t the tent or the sleeping bag. It’s the stuff you think you “might need.”
Let’s be brutal. That hairdryer? Leave it. The three pairs of jeans? One pair, max. The “emergency” hardcover book? Download it. Every gram you carry is a gram you’ll curse by day three.
The 10-Kilogram Rule
Your total pack weight, including the bag itself, should not exceed 10 kilograms (22 pounds). This is not a suggestion. It’s a physical limit for comfortable travel on public transport, up hostel stairs, and through city streets. A 15-kilogram pack will ruin your trip.
To hit 10 kilos, start with the bag. The Osprey Farpoint 40 (40 liters, 1.4 kg empty, $190) is the gold standard for a reason. It fits carry-on size for most airlines and forces you to edit your gear. The Deuter Transit 40 ($160, 1.3 kg) is a solid alternative with a slightly different harness fit.
The Three-Pile Method
Before you pack, make three piles on your bed:
- Pile 1: Non-negotiables. Passport, wallet, phone, charger, one pair of shoes, one jacket, medication. This pile stays.
- Pile 2: Nice to have. Second pair of pants, extra shirt, book, camera, toiletries. Cut this pile in half.
- Pile 3: “Just in case.” That formal outfit, the third pair of socks, the travel board game. This pile gets removed entirely.
Most people’s Pile 3 is larger than Pile 1. That’s the problem.
Gear That Actually Matters (And What to Skip)
Backpacking gear is a minefield of overpriced junk. You don’t need a $400 ultralight tent for hostel hopping. But you do need a few things that make the difference between a good trip and a miserable one.
| Item | Why It Matters | Real Cost | Cheap Alternative |
|---|---|---|---|
| Silk sleeping bag liner | Hostel sheets are rarely clean. A liner adds warmth and hygiene. | $50 (Sea to Summit Silk Liner) | $15 cotton liner from Amazon |
| Merino wool socks (2 pairs) | Wear them 3-4 days without smell. Prevents blisters. | $25/pair (Darn Tough or Smartwool) | $10 synthetic hiking socks |
| Packable down jacket | Warmth without bulk. Works as a pillow in a pinch. | $80 (Uniqlo Ultra Light Down) | $40 fleece (heavier, less warm) |
| Water bottle with filter | Save money on bottled water. Safe to drink from taps. | $45 (Lifestraw Go) | $25 (Grayl Geopress) |
| Portable charger (10,000 mAh) | Hostel outlets are scarce. This keeps your phone alive. | $25 (Anker PowerCore) | $15 off-brand (slower charge) |
What to skip entirely: camping stove (you’re in cities, not the wilderness), hiking boots (trail runners or sneakers work better), travel towel (hostels rent them for $1), and any “multi-tool” with a knife (it will get confiscated at airport security).
The Budget Trap: What First Timers Spend Too Much On
Here’s a hard truth: most first time backpackers blow their budget in the first week. They buy expensive gear they don’t need, eat in tourist restaurants, and take taxis instead of walking. Then they run out of money by week three and eat instant noodles for a week.
I did this. My first trip, I spent $80 on a fancy travel pillow I used exactly once. I bought a $60 multi-tool that stayed in my bag. I took a $40 taxi from the airport because the bus seemed “complicated.” That was a week of meals I threw away.
Where Your Money Actually Goes
For a 30-day trip through Southeast Asia or Eastern Europe, realistic daily costs break down like this:
- Accommodation: $10-20/night (hostel dorm bed)
- Food: $10-15/day (street food and local markets, not restaurants)
- Transport: $5-10/day (buses, trains, walking)
- Activities: $5-15/day (museums, hikes, entry fees)
- Miscellaneous: $5/day (laundry, toiletries, water)
That’s $35-65 per day. For 30 days, budget $1,000-$2,000 total, plus your flight. If your daily spending hits $100, you’re doing something wrong.
The Biggest Budget Killer
It’s not the hostel. It’s the impulse purchases. Drinks at a bar, a souvenir scarf, a “must-see” paid tour that’s actually a trap. Set a daily cash limit. Withdraw that amount each morning. When the cash is gone, you stop spending. This single habit will save you hundreds.
Common Mistakes That Ruin First Trips (And How to Avoid Them)
I’ve seen backpackers cry in train stations. I’ve seen them stranded without a bed at midnight. I’ve seen them lose their passport on day two. These are not bad luck. These are mistakes you can avoid.
Mistake 1: Overplanning the itinerary. You book 12 cities in 14 days. You spend every other day on a bus. You see nothing except the inside of a train. Fix this: pick 3-4 cities max per month. Stay at least 3 nights in each. You’ll actually experience the place instead of just checking it off a list.
Mistake 2: Not buying travel insurance. A friend broke his ankle in Thailand. The hospital bill was $15,000. His insurance cost $60. Do the math. World Nomads and SafetyWing both offer plans for around $50-80 per month. Buy it before you leave. Not after.
Mistake 3: Trusting Google Maps blindly. Google Maps doesn’t know that bus line was canceled last week. It doesn’t know that “open 24 hours” means “open when the owner feels like it.” Always confirm with hostel staff or a local. Ask two different people. If they disagree, ask a third.
Mistake 4: Carrying valuables visibly. A phone in your back pocket, a camera hanging from your neck, a wallet in an open bag. These are invitations. Use a zippered pocket inside your jacket. Keep your phone in your front pocket. Leave the expensive jewelry at home.
Mistake 5: Ignoring your body. You push through exhaustion because you want to see “one more thing.” Then you get sick. Then you lose three days in bed. Rest is part of the trip. Take a zero day every 5-7 days. Do nothing. Eat well. Sleep. Your trip will be better for it.
When Backpacking Is the Wrong Choice (And What to Do Instead)
Backpacking is romanticized. It’s not for everyone. And trying to force it when it doesn’t fit will make you miserable.
If you hate uncertainty, if you need a private bathroom every night, if you can’t handle loud hostels at 2 AM, backpacking will break you. That’s not a character flaw. It’s a preference.
Consider a short-term rental instead. Rent an apartment in one city for 2-4 weeks. Use it as a base. Take day trips. You get stability, a kitchen, and your own space. Cost is similar to hostels ($30-50/night for a studio in most cities).
Consider a guided small group tour. Companies like Intrepid Travel and G Adventures run 10-14 day trips for $1,500-2,500. Everything is arranged. You meet people. You get local guides. You still travel with a backpack, but you don’t have to figure out logistics.
Consider a working holiday. If you’re under 30, get a working holiday visa for Australia, New Zealand, or Canada. You work for 3-6 months, then travel with real money. This is slower, deeper travel. You actually live somewhere instead of just passing through.
The point is this: backpacking is a tool, not a test of character. If it doesn’t serve you, use a different tool.
Your First Night: What to Do When You Arrive
You land. You’re jet-lagged. You’re overwhelmed. This is the moment where trips fall apart or come together. Here’s exactly what to do in the first 4 hours.
Step 1: Get local cash. Exchange $50-100 at the airport ATM. Do not use the currency exchange booths — they take 10-15% in fees. ATMs give you the real rate. Withdraw enough for 2-3 days.
Step 2: Get to your accommodation. Use public transport. Not a taxi. The bus from the airport costs $2. The taxi costs $30. You’ll learn the city’s transport system immediately. Google Maps and Citymapper both work in most major cities.
Step 3: Drop your bag and walk. Do not unpack. Do not sit down. Walk for 30 minutes in any direction. Find a grocery store. Buy water, snacks, and breakfast for tomorrow. This kills the jet lag and orients you to the neighborhood.
Step 4: Eat dinner at 6 PM. Find a local restaurant away from the main tourist street. If the menu has photos, walk away. If it’s full of locals, sit down. Order what the person next to you is eating.
Step 5: Sleep by 9 PM. You’ll wake up at 5 AM with jet lag. That’s fine. Use the early morning to explore before the crowds arrive. The city is yours for two hours before anyone else wakes up.
That first night sets the tone. Do it right, and the rest of the trip flows. Do it wrong, and you’ll spend three days recovering.